
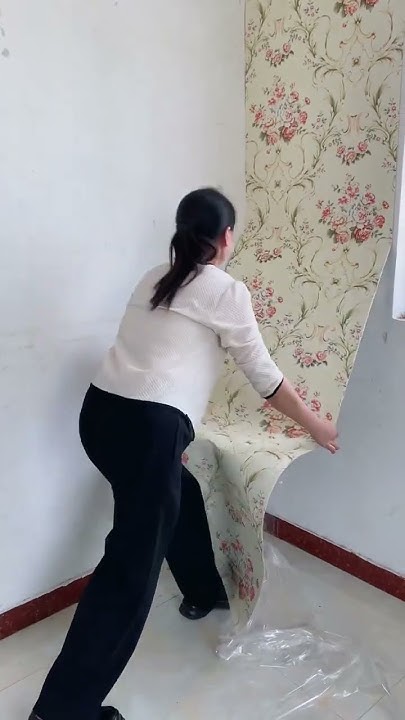
Wallpaper adds beauty and character to your home but requires proper maintenance to keep it looking its best. Over time, issues such as peeling edges, loose seams, and tears can mar its appearance and reduce its lifespan.
Addressing these common wallpaper problems promptly can prevent more extensive damage, saving you time and money in the long run.
This guide covers everything from simple patch repairs to fixing damaged areas and reattaching loose paper. Continue reading to learn how to maintain and repair your wallpaper effectively, ensuring it remains a vibrant part of your home’s decor.
Preparing for Wallpaper Repair
Inspect the wall surface carefully to identify any loose seams or areas where the wallpaper has come unglued from the wall beneath. Look for damaged sections where the wallpaper has bubbled or detached due to excess moisture or improper application.
Identify the Types of Wallpaper Damages
Before diving into repairs, it’s crucial to understand the different types of damage your wallpaper might face. The following are the common wallpaper damages that you may encounter:
- Peeling Wallpaper: Often found at corners or along edges where the adhesive has failed.
- Loose Seams: Where the edges of wallpaper strips have come apart.
- Wallpaper Tears: Physical damage that can occur from impacts or during furniture moves.
- Bubbles: These are caused by trapped air or a failure to smooth the wallpaper during application.
Gather the Necessary Tools and Materials
To effectively address the issues identified, ensure you have the right tools and materials on hand.
Here’s a list to help you start your wallpaper repair project:
- Seam Roller: To smooth out edges and reinforce the adhesive.
- Spackling Compound: Useful for filling holes or gaps before applying new wallpaper sections.
- Wallpaper Adhesive and Paste: Essential for reattaching loose sections and ensuring they stick to the wall surface.
- Repair Adhesive: Specifically designed for mending tears and sealing seams.
- Damp Cloth: Helps clean the wall surface and remove excess paste or dirt.
- Heat Gun: Useful for gently removing old wallpaper or loosening adhesive without damaging the wall.
- Glue and Tube of Wallpaper Patch: This is for precise application on damaged spots.
Having these tools ready streamlines the process and ensures that you can handle any residential and commercial wallpaper issue that might arise during your project. With the right preparation, you can restore the beauty of your wallpaper, making it look as good as new.
Step-by-Step Wallpaper Repair Guide
Effective wallpaper repair can rejuvenate your walls and restore your room’s overall aesthetic. This guide will take you through the fundamental steps needed to fix common wallpaper issues using straightforward techniques and readily available materials.
Step 1: Repairing Small Tears and Punctures
- Prepare the Area: Gently wipe the damaged area with a damp cloth to ensure it’s free of dust and debris.
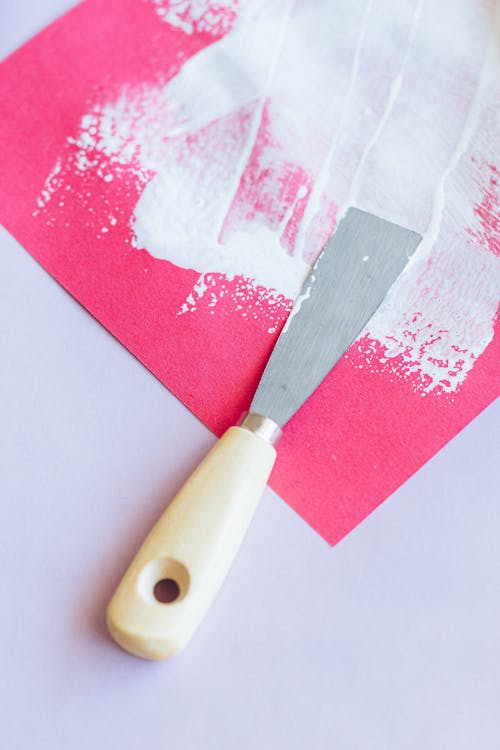
- Apply Spackling Compound: Use a small amount of spackling compound to fill any small tears or punctures. Ensure you apply an even coat and smooth it out to form an invisible repair.
- Seal with Adhesive: Once the spackling is dry, apply a thin layer of wallpaper adhesive over the area to reinforce the repair. Press firmly to ensure the adhesive bonds well with the existing wallpaper and the wall beneath.
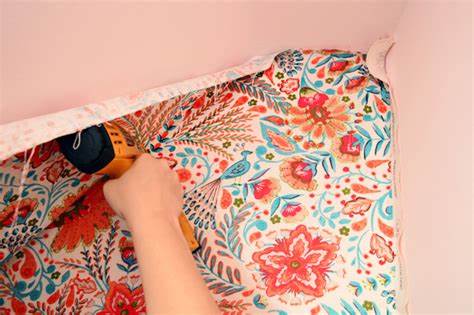
Step 2: Fixing Peeling Wallpaper Edges
- Clean the Loose Edges: Use a damp cloth to clean the edges of the peeling wallpaper, removing any excess paste or dirt.
- Apply Wallpaper Paste: For precision, spread a thin layer of wallpaper paste under the peeling edges using a small brush or a syringe.
- Press and Smooth: Carefully press the wallpaper back against the wall. Use a seam roller to smooth out the edges and ensure a tight seal without bubbles.
Step 3: Reattaching Loose Seams
- Prepare the Seam: Clean the open seams with a damp cloth to remove any debris or loose adhesive.
- Apply Repair Adhesive: Use a tube to carefully apply a small amount of seam repair adhesive under the loose seam.
- Secure the Seam: Press the wallpaper back into place and use a seam roller to smooth down the seam, ensuring it sticks to the wall evenly without any wet patches showing.
Step 4: Dealing with Bubbles and Air Pockets
- Locate the Bubbles: Gently press on the wallpaper to find air pockets and mark these areas.
- Puncture the Bubble: Using a small needle, puncture the bubble at its center.
- Inject Adhesive: Insert a syringe filled with a small amount of wallpaper paste and gently squeeze to fill the void beneath the bubble.
- Smooth and Seal: Press down on the area to spread the adhesive and roll over it with a seam roller to ensure it’s completely flat against the wall surface.
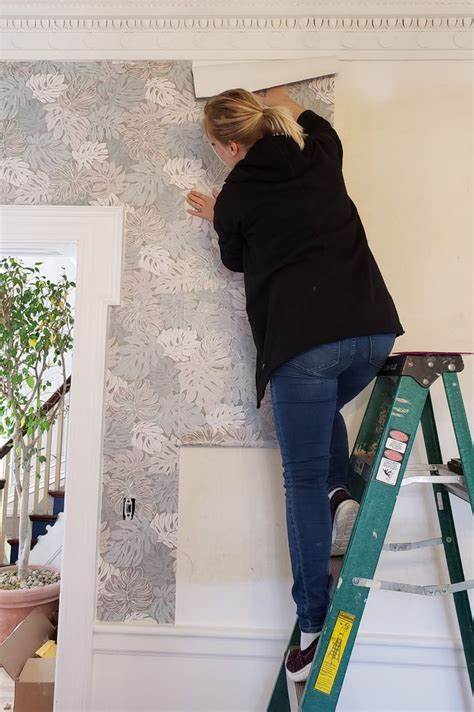
Step 5: Replacing Entire Sections of Wallpaper
- Remove Damaged Wallpaper: Use a heat gun to loosen the adhesive and carefully remove the damaged section of wallpaper. Clean the exposed wall area thoroughly.
- Cut New Wallpaper: Measure and cut a new piece of wallpaper that matches the pattern and size of the removed section.
- Apply Adhesive: Spread a coat of wallpaper adhesive on the back of the new piece.
- Install the New Section: Carefully align the new piece with the existing wallpaper patterns at the edges and press it into place. Use a roller to smooth out any seams or edges.
By following these detailed steps, you can effectively address common wallpaper damage, ensuring a professional finish that revitalizes your room’s appearance.
Specific Wallpaper Repair Scenarios
Addressing wallpaper repairs requires an understanding of the various surfaces and materials involved. This section delves into tailored methods for fixing wallpaper on different substrates, ensuring effective and long-lasting results.
Fixing Wallpaper on Drywall
Drywall, a common but delicate substrate, poses unique challenges due to its softness and susceptibility to water damage. Inspect the drywall for moisture damage or indentations, which could compromise the wallpaper’s adherence.
Prepare the surface by filling any holes with a spackling compound, then sand it smooth once dry to create a uniform wall surface. When applying adhesive, use just enough to secure the wallpaper without saturating the drywall, as excess moisture can compromise the wall’s integrity.
Press the wallpaper gently against the drywall using a soft roller, being careful not to damage the wall beneath.
Repairing Vinyl Wallpaper
Vinyl wallpaper is known for its durability and moisture resistance, making it an excellent choice for areas like kitchens and bathrooms. To repair vinyl wallpaper, thoroughly clean the surface with a damp cloth to ensure no grime interferes with adhesion.
To ensure a robust bond, use an adhesive specifically formulated for vinyl materials. If the wallpaper is peeling, gently heating the area with a hairdryer can increase the material’s flexibility, making it easier to reattach.
After applying the adhesive, press the vinyl firmly back into place, ensuring it lays smooth and bubble-free.
Dealing with Wallpaper on Painted Surfaces
Consider applying a primer to offer a layer of grip for the wallpaper. When it’s time to apply the wallpaper, spread a thin and even layer of paste across the surface to prevent any lumps that could show through the paper.
Extra care should be taken with corners and edges to ensure they adhere well and are less likely to peel over time.
Advanced Wallpaper Repair Techniques
Advanced repair techniques are essential for effectively addressing complex wallpaper issues, such as excessive adhesive or the delicate task of restoring historical or patterned wallpapers.
Using a Heat Gun for Seam Wallpaper Repairs
A heat gun is an effective tool for softening old adhesive along wallpaper seams, allowing for easier adjustments and reattachments. To use a heat gun for seam repairs, start by gently heating the affected seam, keeping the heat gun at a safe distance to avoid overheating the paper.
As the adhesive softens, carefully lift the seam using a putty knife if necessary. Once pliable, apply a small amount of fresh wallpaper paste, press the seam back into place, and use a seam roller to ensure it adheres smoothly, avoiding any bubbles or wrinkles.
Managing Wallpaper with Excessive Wallpaper Adhesive
When dealing with excess adhesive behind wallpaper, it’s crucial to approach the issue with care to maintain the wall’s appearance:
- Remove Excess Paste: Gently wipe away the excess adhesive with a damp cloth. Be careful not to saturate the wallpaper or rub it too harshly, which might damage the paper.
- Use Solvent Sparingly: If adhesive residues are stubborn, apply a small amount of solvent on a cloth and dab it onto the affected area to help dissolve the glue.
- Reapply Adhesive Correctly: After cleaning the surface, apply a new, thin layer of adhesive evenly across the surface to ensure a smooth finish.
Restoring Historical or Patterned Wallpaper
Restoring wallpapers that have historical value or intricate patterns requires a detailed approach to preserve their aesthetic integrity:
When cutting a new piece to fit a damaged area, ensure the patterns align perfectly with the existing wallpaper. Choose an adhesive that is compatible with delicate or aged wallpapers to avoid further damage.
Position the new piece of wallpaper carefully, starting from one end and smoothing it towards the other to avoid trapping air bubbles and ensuring a seamless blend with the existing wallpaper.
These refined techniques are designed to address specific challenges in wallpaper repair, ensuring that your efforts restore the wall coverings to their original splendor while maintaining their structural and visual integrity.
Additionally, these methods complement advanced wallpaper printing solutions, enhancing both the aesthetic and functional aspects of your wallpaper.
Aftercare Cleaning and Maintaining Repaired Wallpaper
Proper aftercare and maintenance are crucial for extending the life of your repaired wallpaper and ensuring it remains a highlight of your home’s interior.
Maintaining your wallpaper begins with regular cleaning and careful handling:
- Routine Cleaning: Regularly Dust the wallpaper with a soft, dry, or very lightly dampened cloth. Avoid using harsh chemicals or abrasive cleaners that can damage its surface.
- Spot Cleaning: For spots or stains, use a mild detergent diluted with water and apply gently with a sponge or soft cloth, taking care not to soak the paper.
- Check for Adherence: Periodically inspect repaired areas, especially seams, to ensure they remain securely attached. If you notice any lifting, apply some adhesive and press the section back into place.
Preventing Future Wallpaper Issues
To avoid common wallpaper problems and ensure long-lasting repairs:
- Monitor Humidity Levels: Control indoor humidity levels to prevent wallpaper from peeling or bubbling. Using a dehumidifier in high-humidity areas can be beneficial.
- Protect from Direct Sunlight: Avoid exposing wallpaper to direct sunlight, which can cause fading or warping. Use curtains or blinds to minimize sunlight exposure.
- Proper Installation: Ensure that any future wallpaper installations use the correct amount of paste and that the wallpaper is adequately smoothed during application to avoid air pockets or misaligned seams.
Implementing these maintenance and preventive strategies will help maintain your wallpaper’s aesthetic appeal and integrity, making it a durable and attractive feature of your home décor.
What to Do If Wallpaper Repair Fails?
Even with the best efforts, wallpaper repairs can sometimes fall short of expectations. If your initial wallpaper repairs don’t hold, it’s important to assess and rectify the situation promptly:
- Reevaluate the Repair Area: Inspect the failed repair to determine if issues like excess moisture or inadequate adhesive application caused the problem.
- Prepare the Surface Properly: Ensure the wall underneath is clean, dry, and smooth before reapplying. Remove any loose adhesive or debris that could prevent the wallpaper from adhering.
- Use the Right Materials: Apply a suitable adhesive, and if needed, use a stronger or more appropriate type based on the wallpaper design and wall condition.
- Test Small Sections: Before redoing a large area, test the repair on a small section to confirm the effectiveness of your approach.
Addressing Wallpaper Repair Myths
Common myths about wallpaper repair can lead to unnecessary complications and ineffective practices:
“More Adhesive Is Better”
Too much paste can lead to bubbling and peeling. It’s crucial to apply an even coat of adhesive according to product details and manufacturer recommendations.
“All Wallpapers Are the Same”
Different materials (e.g., vinyl and fabric) require specific types of adhesives and repair techniques. Understanding your wallpaper’s specific needs is essential.
“Quick Fixes Are Enough”
Some issues might look superficial but could indicate deeper problems like moisture damage or structural issues with the wall itself. Thorough inspections and proper repairs are necessary to ensure long-term results.
Summarizing Wallpaper Repair Practices
As we wrap up our comprehensive guide to wallpaper repair, it’s important to revisit the key practices that will help you effectively maintain and restore the beauty of your walls.
Proper care and maintenance are essential for aesthetic appeal and the longevity of your wallpaper design.
From small tears and loose seams to complete replacements of damaged sections, each repair contributes to your wallpaper’s overall integrity and appearance.
Remember:
- Regular Maintenance: Regularly inspect and clean your wallpaper to prevent minor issues from becoming major problems.
- Proper Techniques: Use the appropriate materials and follow the recommended practices for each type of wallpaper and problem, whether it’s a vinyl corner or an intricate wallpaper seam repair.
- Attention to Detail: Pay close attention to the specifics of each repair task, from preparing the surface to applying the correct amount of adhesive.
Maintaining your wallpaper through regular care and timely repairs ensures it remains a highlight of your home’s decor. If the task seems daunting or if you prefer flawless results, consider hiring a professional. A professional wall design and wallpaper printing services offers expert wallpaper installation and repair services.
With their experience and meticulous attention to detail, they can help you achieve the perfect finish, ensuring your wallpaper always looks its best.