
Removing wallpaper from your walls can transform the look of any room, but the job doesn’t end with just peeling off the old paper. A crucial step remains: cleaning the walls thoroughly to ensure a smooth surface suitable for painting or applying new wallpaper.
This process often involves tackling common challenges such as persistent glue residue, including wallpaper glue and paste, which can damage the underlying wall if not removed properly. Whether you’re facing layers of old wallpaper or dealing with various types of adhesive like paper glue and wallpaper paste, the right approach is essential for preparing your walls for their next makeover.
Continue reading to discover effective strategies and tips for cleaning walls after wallpaper removal, ensuring your next DIY project is flawless from start to finish.
Getting Started
Preparation is key when embarking on a wallpaper removal project. This initial stage sets the tone for a successful and efficient cleaning process, ensuring that your walls are primed and ready for their next decorative venture.
Before you begin removing the old wallpaper, it’s essential to assemble all the necessary tools and materials. This ensures everything you need is at hand, reducing disruptions once you start the project.
- Putty Knife: Essential for gently scraping off wallpaper and glue residues.
- Spray Bottle: Useful for applying warm water or cleaning solutions to wallpapered walls.
- Rubber Gloves: Protect your hands from moisture, hot water, and chemical solutions.
- Sponges: Needed for washing walls after paper removal.
- Bucket: Holds the cleaning solution or warm water mix, making soaking and washing the walls easier.
Protect Your Flooring and Furniture
Proper protection is crucial to safeguard your flooring and furniture from damage during the wallpaper stripping and wall cleaning process.
Cover your floors and any furniture that cannot be moved out of the room. This helps catch any drips of water or bits of wallpaper, making cleanup much easier. Secure the edges of the plastic wrap or drop cloths to avoid slippage and ensure complete coverage.
By carefully preparing your workspace and having the right tools on hand, you can confidently tackle the task of removing wallpaper and cleaning your walls.
Removing the Wallpaper

Removing wallpaper is a critical step in refreshing your home’s walls. Whether you’re dealing with a room that has been wallpapered for decades or just looking to update a recently papered area, understanding the right technique to use can save you time and effort.
The Dry Strip Method
For strippable wallpapers, the dry strip method is often the most straightforward and least messy option. This method involves:
- Testing a Corner: Start by gently lifting a corner of the wallpaper with a putty knife or your fingers to see if it comes off easily.
- Peeling at an Angle: If the wallpaper peels away without tearing, continue to pull it at a steady angle. This technique minimizes damage to the underlying wall.
- Checking for Residue: As you strip the wallpaper, check the wall for any adhesive residues. Strippable wallpapers typically leave little to no glue behind, making cleanup simpler.
Using Liquid Solutions
When dealing with more stubborn wallpapers or those that don’t peel off easily, a liquid solution can help soften the adhesive for easier removal. Here’s a step-by-step guide:
- Prepare the Solution: Mix warm water with a bit of liquid dish soap or add fabric softener to help dissolve the glue. Vinegar can be an effective additive for tougher adhesives.
- Fill a Spray Bottle: Pour your solution into a spray bottle for easy application.
- Saturate the Wallpaper: Generously spray the solution onto the wallpaper, focusing on one section at a time. Allow it to soak in for several minutes.
- Scrape Gently: Gently lift the wallpaper using a putty knife or scraper. If it resists, reapply the solution to soften the glue further.
- Wash the Walls: After removing all the wallpaper, wash the walls with a sponge and clean water to remove any leftover adhesive.
This prepares your walls for a fresh coat of paint or new wallpaper and helps avoid potential damage from scraping too hard or not softening the adhesive sufficiently.
Addressing Wallpaper Glue Residue
After the wallpaper has been removed, you’re often left with various types of glue residue that can be challenging to remove. Addressing this residue effectively is crucial for preparing your walls for a fresh finish.
Identifying Types of Glue
Differentiating between the types of wallpaper glue is essential for determining the best cleaning method. Water-based wallpaper pastes are generally easier to remove and may dissolve with just warm water and a mild detergent. These pastes are smooth and gel-like when wet.
On the other hand, more stubborn glues, often older or higher-quality adhesives, require more robust solutions to break down. These can appear thicker and more rubbery, sometimes requiring a solvent to dissolve.
Homemade Solutions for Mild Residue
For milder residues, particularly from water-based pastes, homemade solutions can be both effective and economical. Here are some DIY recipes:
a. Baking Soda and Water Paste:
- Mix one part baking soda with one part water to create a paste.
- Apply this paste liberally over the glue residue.
- Allow it to sit for 15 minutes before scrubbing gently with a sponge.
- Rinse with clean water and repeat if necessary.
b. Vinegar Solution:
- Combine equal parts white vinegar and warm water in a bucket.
- Using a sponge or cloth, apply the solution to the glue residue.
- Let the solution soak into the residue for several minutes to break down the glue.
- Gently scrape away the softened glue with a putty knife or plastic scraper.
These simple, DIY solutions are perfect for tackling the remnants of removing wallpaper glue cost-effectively, ensuring that your walls are clean without resorting to harsh chemicals. As you move on to further preparations like sanding or applying a skim coat, remember that thoroughly removing all glue is vital for a smooth finish and the successful adherence of new paint or wallpaper.
Advanced Removal Techniques

When you’re faced with stubborn wallpaper glue, standard removal methods may not suffice. Advanced techniques are necessary to remove all the glue effectively, leaving your walls smooth and undamaged for whatever new finishes you plan next.
Scrape Off the Softened Glue
Removing softened wallpaper glue requires precision and patience. Start with a flexible putty knife, ideally one that’s sharp enough to effectively scrape off the glue but won’t damage the plaster or drywall beneath. Angle the putty knife slightly and gently push it under the glue.
Work in small sections; if the glue resists, reapply your softening agent and give it more time to work before scraping again.
Sanding for Smoothness
Once the bulk of the glue is removed, sanding helps achieve a perfectly smooth surface. Begin with medium-grit sandpaper to tackle any rough patches, and switch to fine-grit to finish off the surface.
Sand in gentle, circular motions, applying even pressure to avoid gouging the wall. After sanding, it’s crucial to remove all dust—wipe the walls down with a damp sponge or cloth to ensure they are clean and ready for the next step.
Using Commercial Adhesive Removers
If you encounter glue that refuses to budge, turning to a commercial adhesive remover may be your best bet. Opt for a product specifically designed to tackle wallpaper glue. Many removers today are formulated with citrus or soy, offering effective results without the harshness of traditional chemicals.
Apply according to the manufacturer’s directions, generally involving either spraying or brushing the solution onto the wall. Allow it to sit and penetrate the glue before scraping or washing it off.
Safety Precautions When Using Chemicals
Using chemical products requires careful handling to ensure safety and effectiveness.
- Ventilation: Always work in a well-ventilated area, especially when using strong solvents. Open windows and use fans if necessary.
- Protective Gear: Wear gloves, goggles, and a respirator mask to protect against harmful chemicals and dust particles.
- Proper Disposal: Follow local regulations for disposing of chemical containers and any waste materials.
These advanced removal techniques require careful execution but can effectively prepare your walls for painting, wallpapering, or any other home improvement project you have planned.
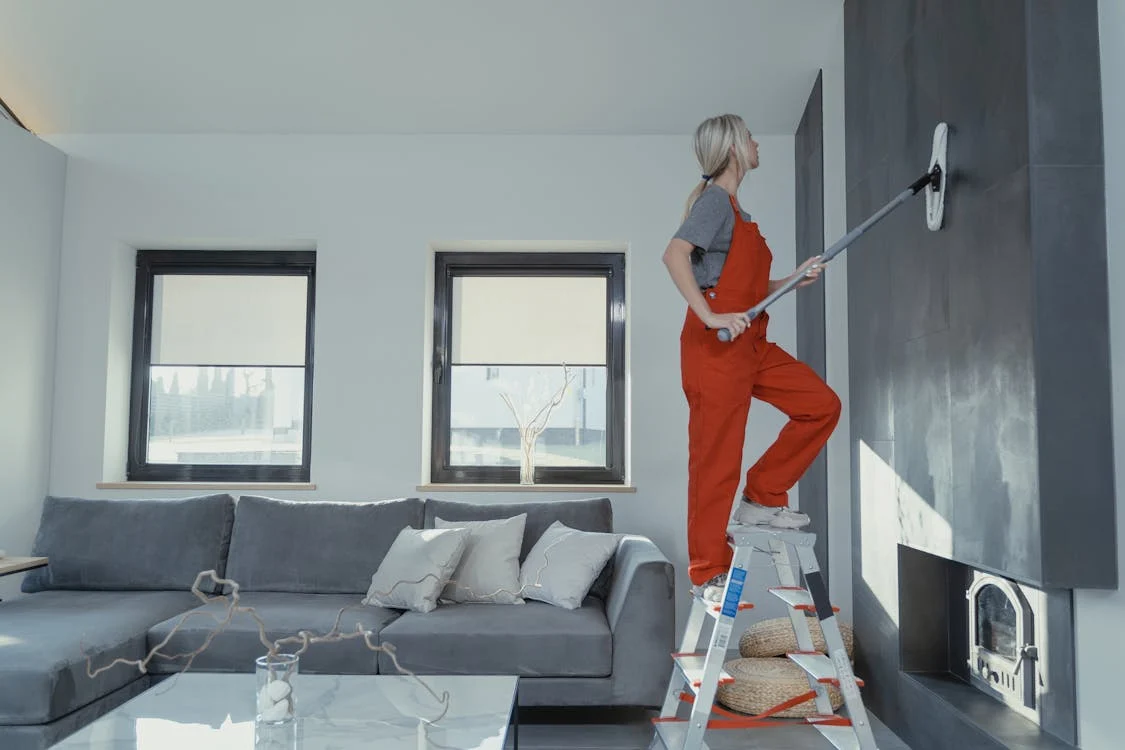
Deep Cleaning the Wall Surface

After removing the wallpaper and addressing any glue residue, the next crucial step is thoroughly cleaning the wall surface. This process ensures that your walls are pristine and ready for further refinishing or decorating, which is essential whether you’re considering a new wallpaper installation or looking to fix peeling wallpaper.
To effectively remove any remaining dust, debris, or glue from your walls, follow these detailed steps:
- Prepare Your Cleaning Solution: Mix warm water with mild liquid dish soap in a bucket. This gentle solution dissolves leftover wallpaper glue without damaging the wall surface.
- Scrub the Walls: Using a sponge, apply the soapy water to the walls in a circular motion, paying extra attention to areas with visible glue residue. For tougher spots, a mixture of warm water and baking soda can be used to gently scrub without scratching the wall.
- Rinse the Walls: After scrubbing, it’s crucial to rinse the walls thoroughly with clean water. Use a clean sponge or cloth to remove all soap and loosened debris.
- Allow Walls to Dry: Let the walls dry completely. This step is vital to prevent mold or mildew from developing under new paint or wallpaper.
A deep clean prepares your walls for the next steps and contributes significantly to the final quality of your room’s renovation. It sets the perfect stage for commercial wallpaper or customized wallpaper designs.
Preparing Walls for Further Work
Once the walls are clean and dry, preparing them properly for painting or new wallpaper is key to achieving a professional-quality finish. Whether you’re planning to design wallpaper for your home walls or looking into wallpaper printing solutions, properly prepped walls are crucial.
Applying a Skim Coat
The process of skim coating is critical for achieving a perfectly smooth wall surface, especially when prepping for high-end finishes such as wallpaper or specialty paint treatments.
- Mix the Joint Compound: Prepare your joint compound according to the manufacturer’s instructions. Ensure the consistency is right for easy application but thick enough to fill gaps and imperfections.
- Apply the Compound: Use a drywall knife to apply a thin, even layer of joint compound over the entire wall surface. This step is crucial for covering any pits, cracks, or unevenness left by the old wallpaper or its removal process.
- Sand Smooth: Allow the joint compound to fully dry. Then, lightly sand the surface to eliminate any ridges or excess material, achieving a flawless finish.
Priming the Walls
Priming the walls is an essential step that ensures the longevity and durability of your wall finish, be it paint or wallpaper.
- Choose the Right Primer: Opt for an oil-based primer if you’re dealing with high moisture areas or need a robust barrier against potential wallpaper paste. This type of primer is excellent for sealing porous surfaces and providing a solid base for further coatings.
- Apply Primer: Use a paint roller to apply a consistent coat of primer over the entire skim-coated wall. Ensure complete coverage to seal the skim coat and promote optimal adhesion of the final wall covering.
- Allow to Dry: It’s critical to allow the primer to dry completely according to the product’s recommended drying time before proceeding with painting or applying wallpaper.
These steps are crucial for ensuring your walls are perfectly prepped. They provide a solid foundation for sophisticated commercial wallpaper applications or unique, customized wall covering designs. Taking the time to prepare your walls carefully can significantly enhance the quality and durability of your final decor.
Final Inspection, Touch-Ups, and Maintenance

Once you’ve thoroughly cleaned, prepped, and possibly redecorated your walls, the next important phase is the final inspection and ongoing maintenance. This ensures your walls remain in top condition and simplifies any changes or updates you wish to make.
Conducting a final inspection of your walls is crucial to identify any areas needing additional attention before you declare the project complete.
- Check for Missed Spots: Carefully examine the walls in good lighting to ensure no spots were missed during the cleaning, priming, or painting stages.
- Assess Smoothness: Feel the walls with your hands to check for any unevenness. If you find any, a bit more sanding may be necessary.
- Look for Consistency: Make sure that any painted or wallpapered surfaces appear uniform. This includes checking that wallpaper seams are perfectly aligned, and that paint has been applied evenly.
- Final Touch-Ups: Use a small brush or roller to fix any inconsistencies or missed spots. If you’re dealing with wallpaper, ensure any edges that have been lifted are securely reattached with the appropriate adhesive.
Regular maintenance is key to keeping your walls looking their best and making any future renovations easier.
Dust and wash walls periodically to prevent dirt buildup. Use a gentle cleaner and a soft cloth or sponge to avoid damaging the surface. If you notice peeling wallpaper or chipped paint, it’s best to address these issues immediately to prevent further damage.
Consider using wall guards or furniture strategically in high-traffic areas to minimize the risk of scuffs and scratches. Keep some leftover paint and wallpaper for minor repairs and touch-ups. This makes sense for maintaining a consistent look throughout your house.
Conclusion
Throughout this guide, we’ve tackled the rewarding challenge of removing old wallpaper and preparing your walls for a fresh appearance. We began by addressing the tough task of stripping wallpaper and using various techniques to remove wallpaper glue. Each subsequent step, from thorough cleaning to sanding and priming, was vital to prep walls effectively, ensuring they were ready for decoration.
As we wrap up, let’s turn this into a discussion starter. Have you encountered the same problem with removing wallpaper glue? How did you prep your walls in other rooms, especially if you’re considering wall design and wall printing services?
Sharing all your help and experiences can offer invaluable insights to others tackling similar projects. Let’s start putting our collective knowledge together to address these common challenges!